
The dry rot problem
What is dry rot? A simple google search will tell you something like:
Dry rot is a fungus that attacks the (wood) in buildings. It digests wood It literally eats it. It can spread without any source of moisture because it generates moisture through digesting wood. It begins when spores find their way onto wet wood. So, while it doesn’t need water to keep growing, it does need water to start. There is also such a thing as wet rot. I think we all understand that ongoing moisture issues do not bode well for wood construction.
Why is it a problem, and why is it worth writing about here?
In Montana, and especially in the drier parts, mold doesn’t tend to be the problem it can be in wetter areas like the Pacific Northwest. But we still get moisture and it can still cause issues. However, here in the Bozeman area, most of the issues I’ve seen have more to do with improper construction than with climate itself. Why is it a problem? A couple of pictures should suffice to answer.
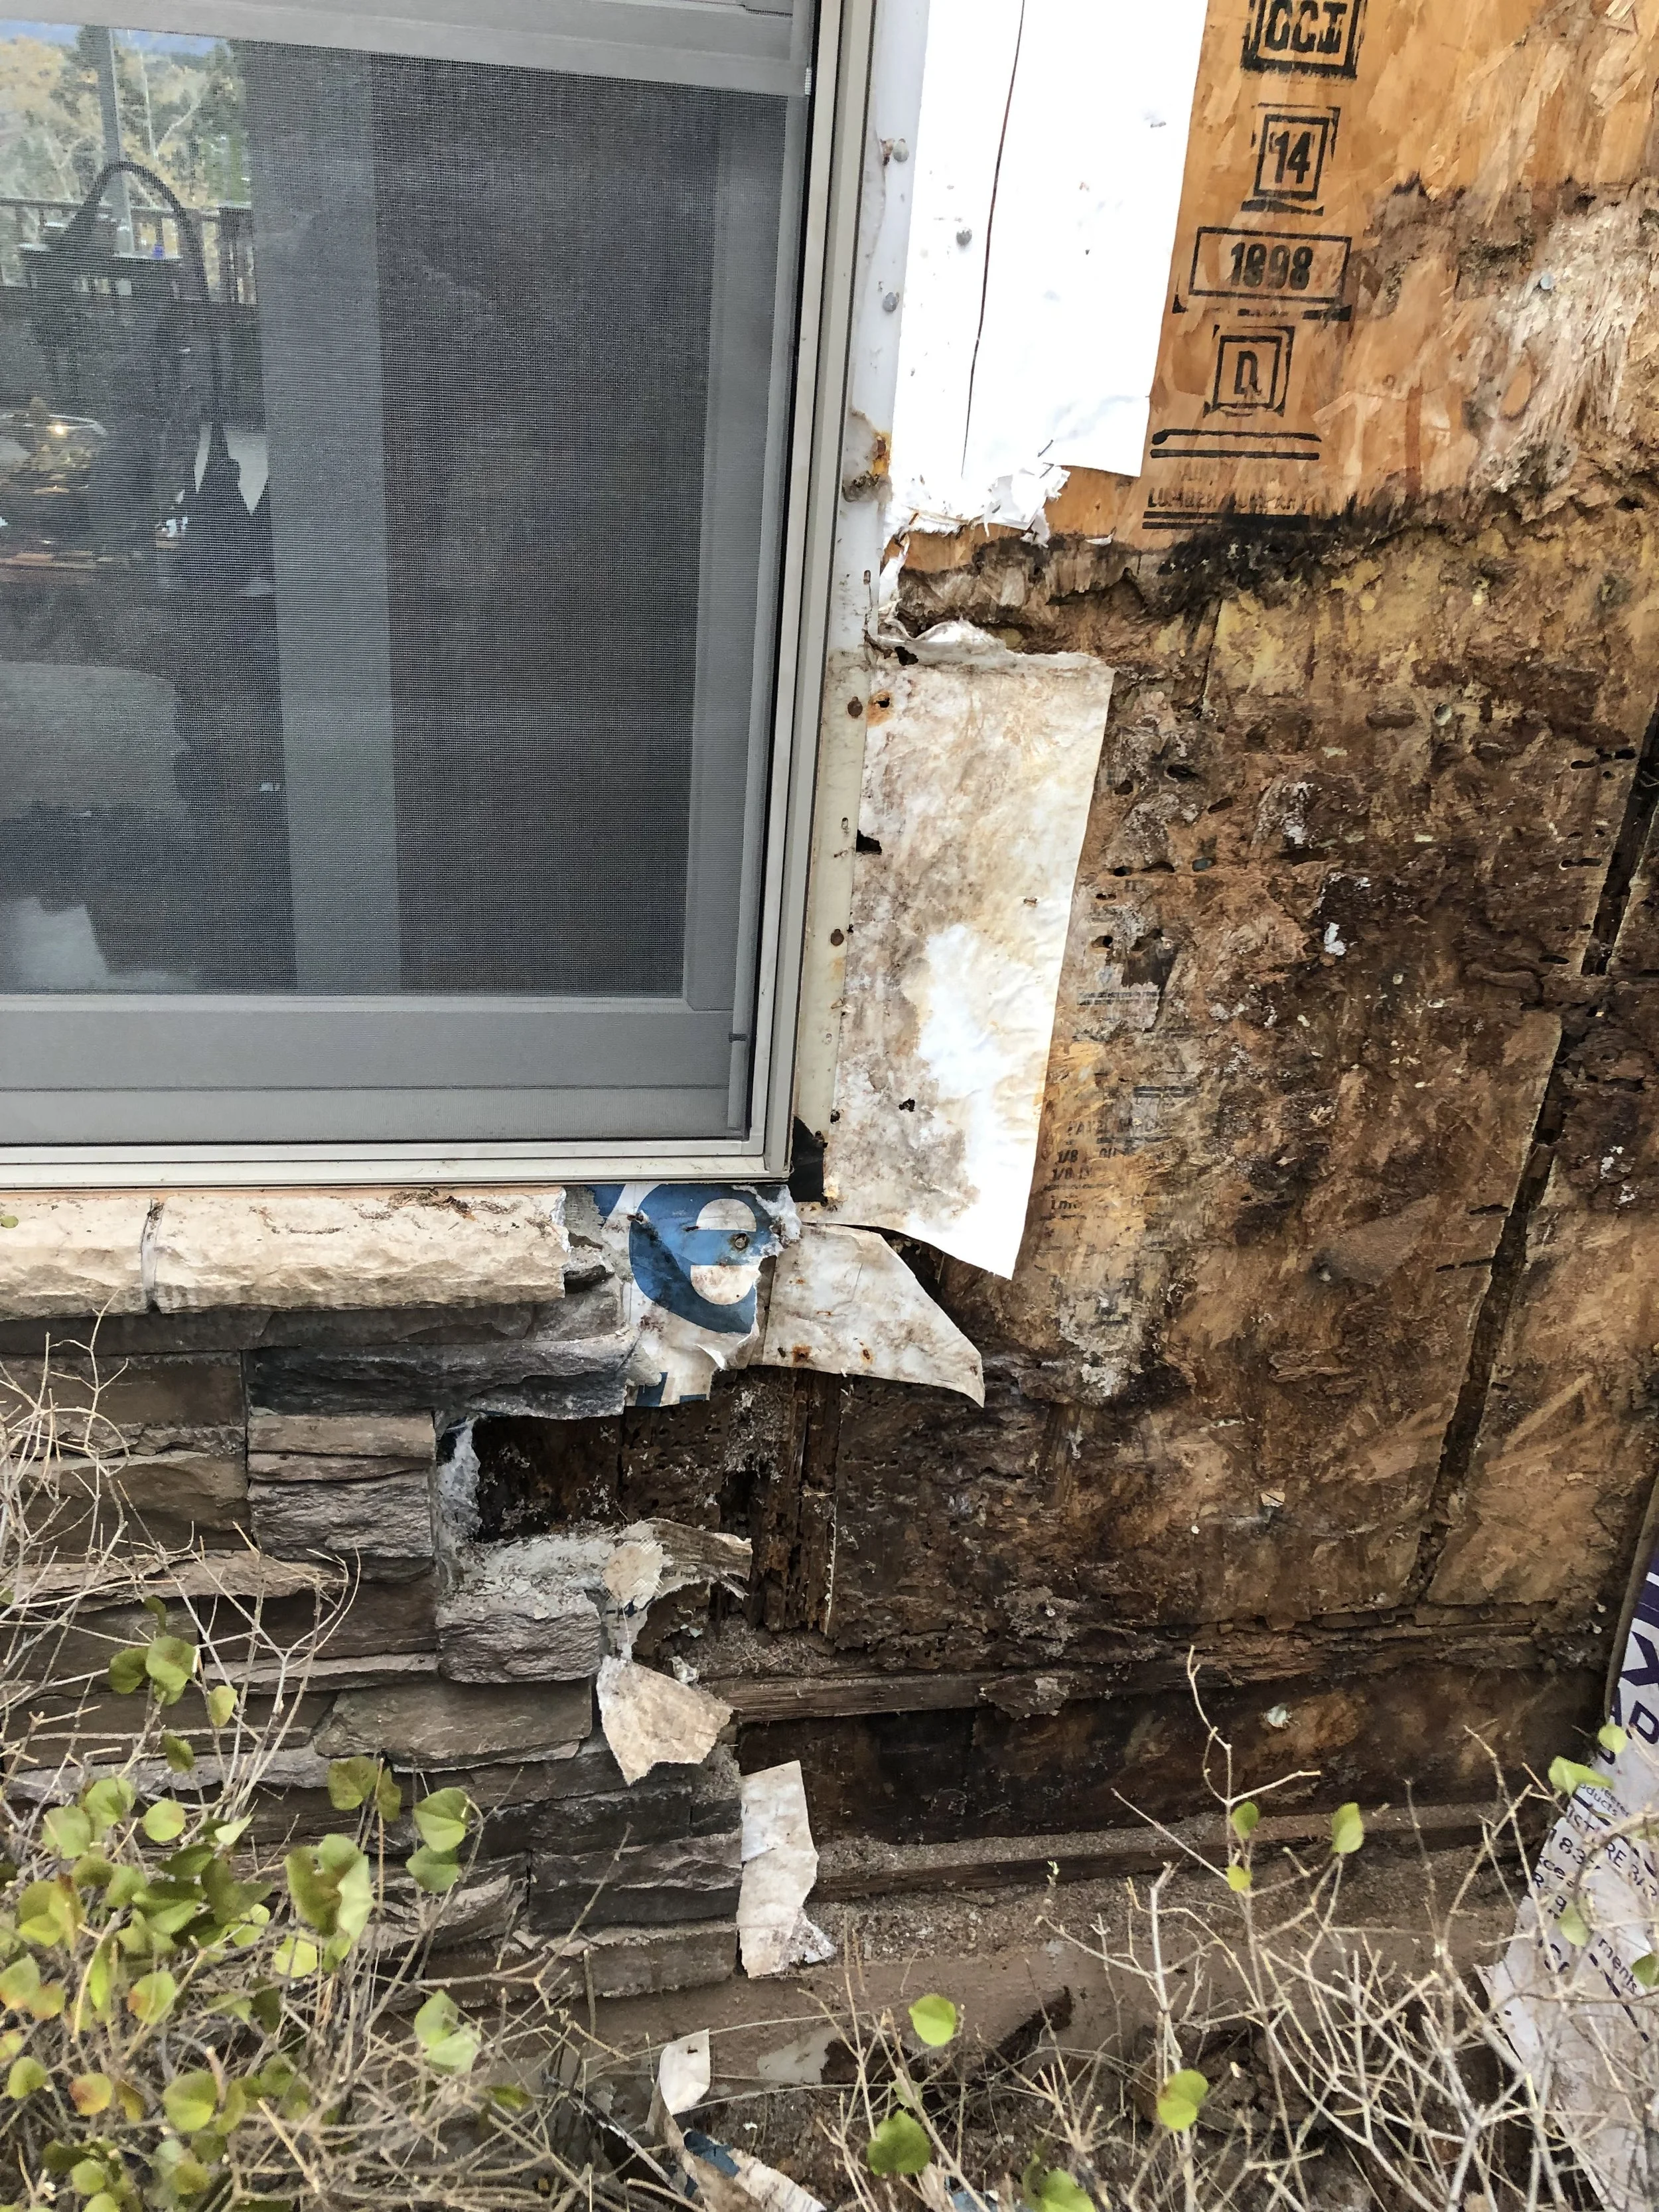
Rotting OSB and framing under a window in Gallatin county, Montana
I’ve seen loads of rot, but it almost always appears in one of two locations: at windows, like the picture above; or at roof/wall interactions like the picture below.
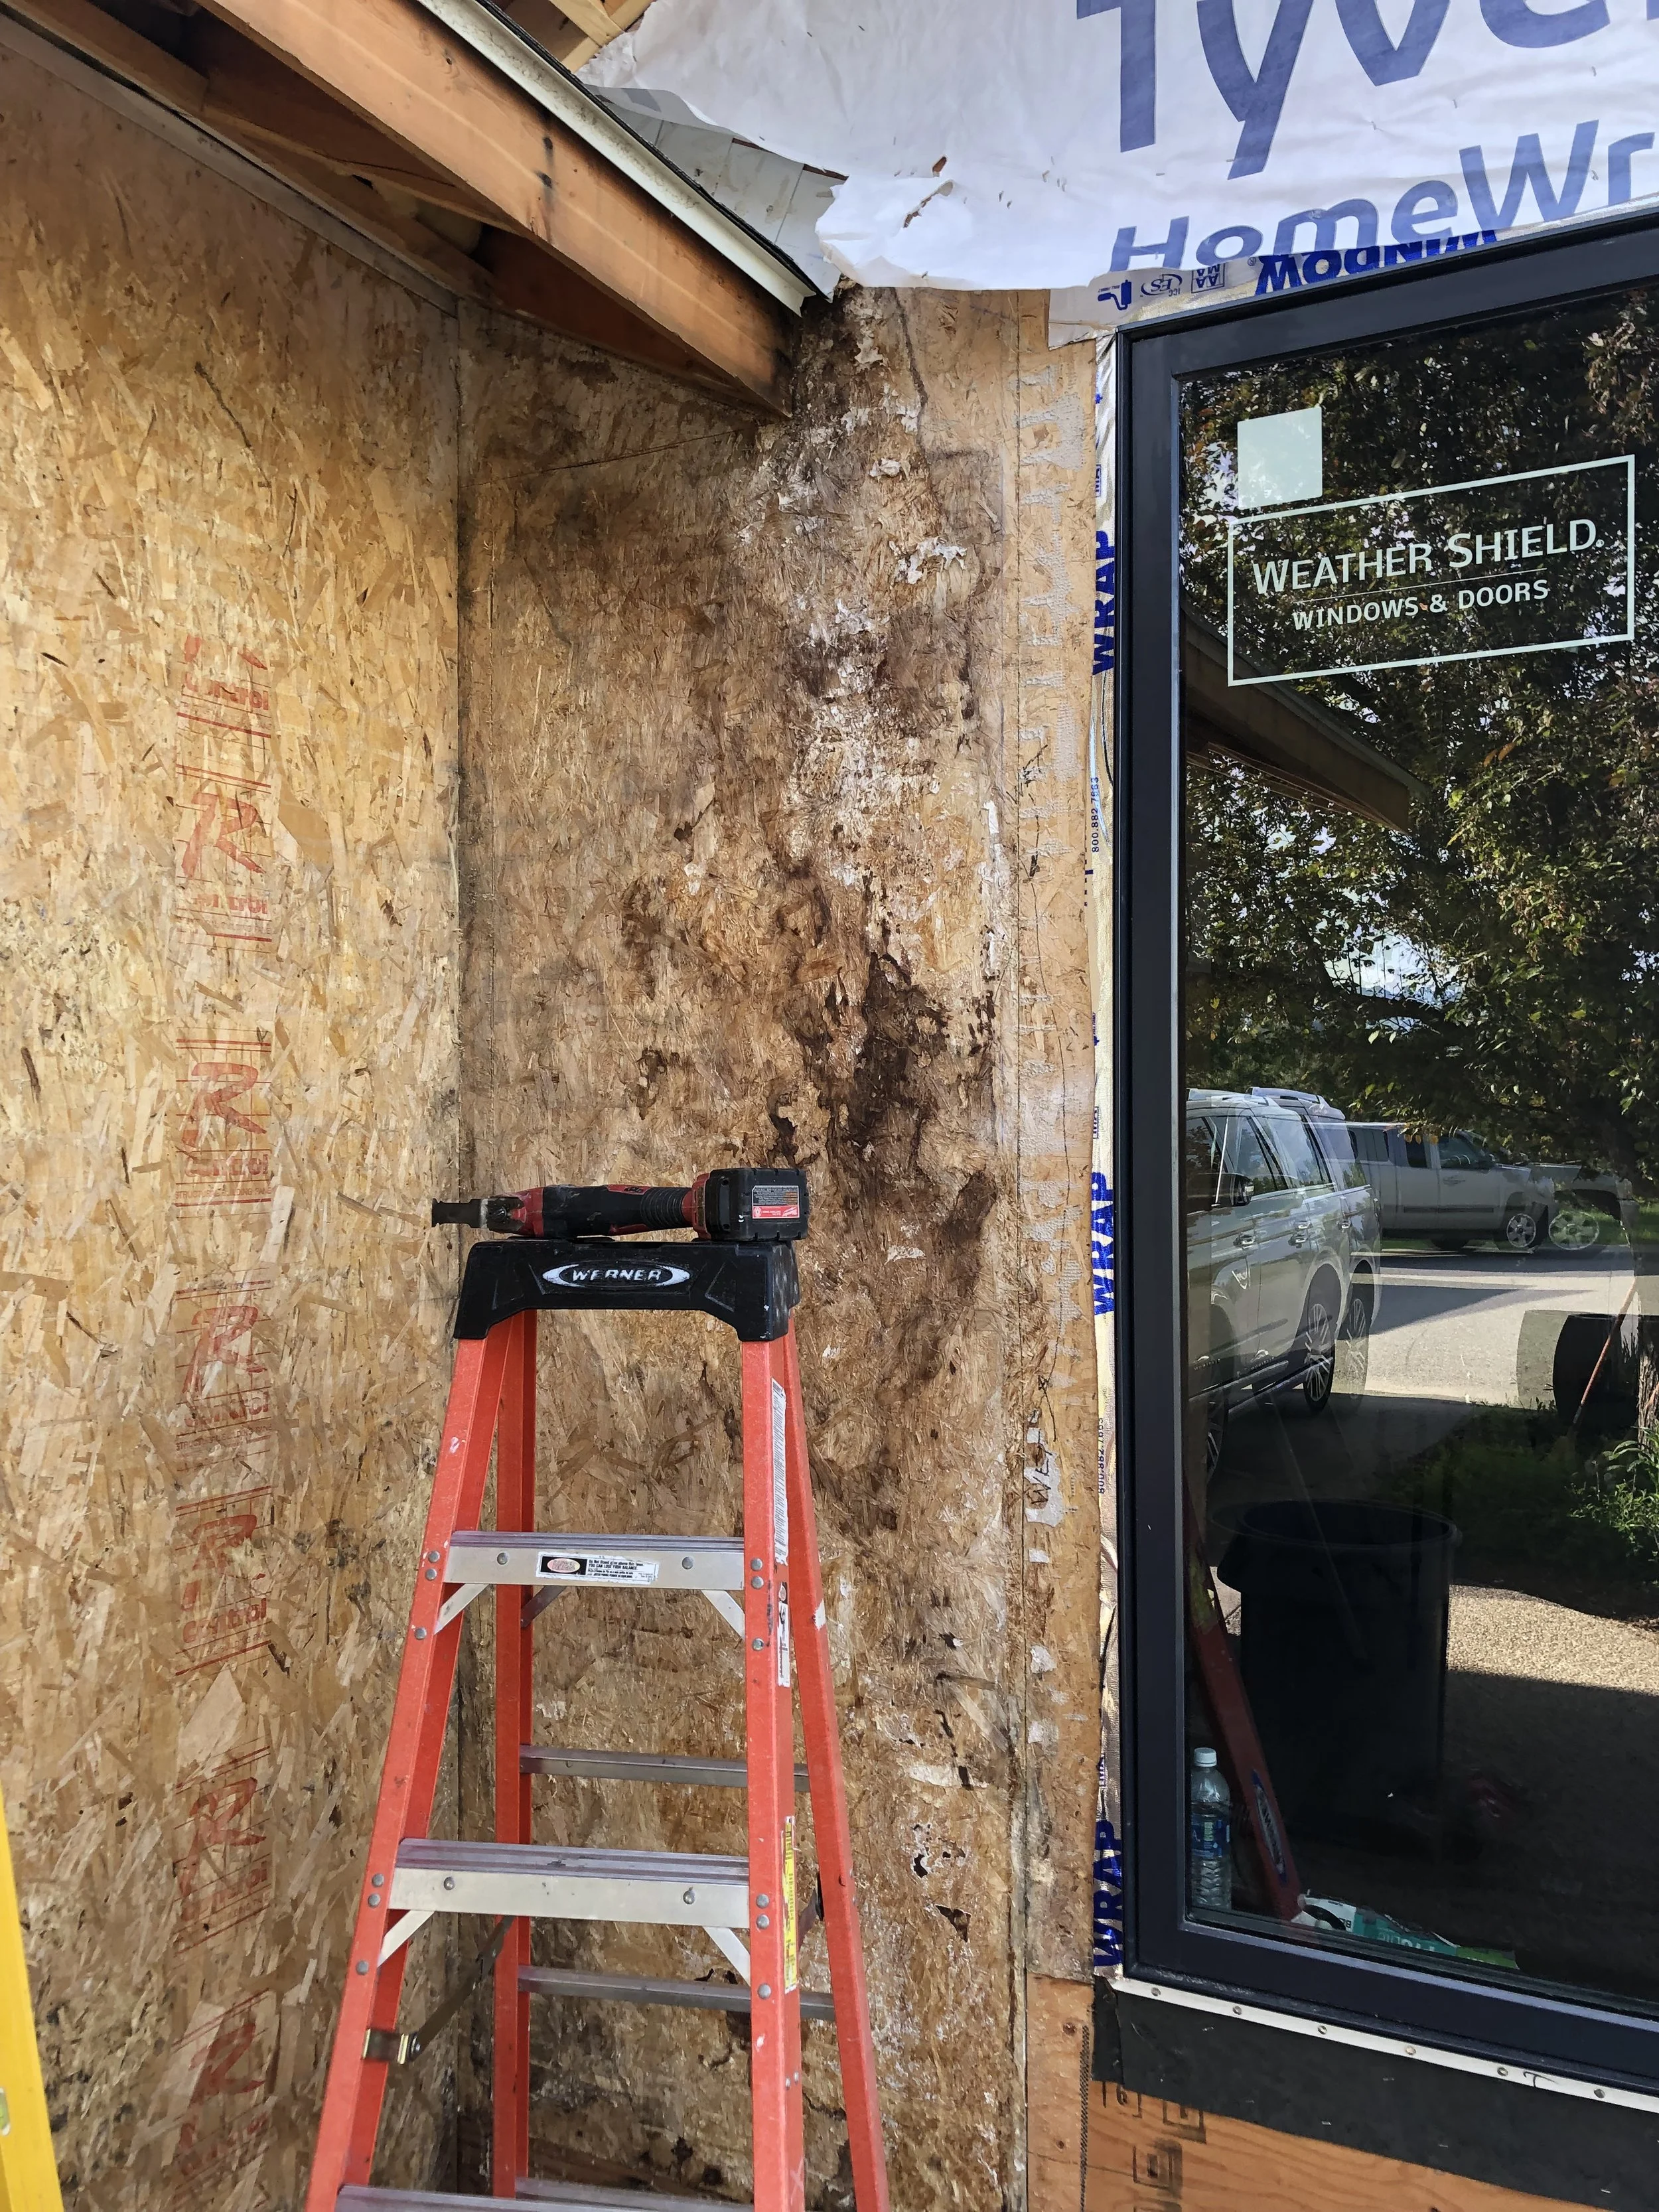
Rot attacks OSB at a roof-to-wall section on a luxury home outside of Bozeman, Montana
Every time I encounter rot, I think of the wasted time and resources it takes to fix it, and what a shame it is to discover it so often, even in some of the most expensive homes in Bozeman. We run into it so often that we now include a contingency clause in our quotes and contracts when we engage in jobs involving window or siding replacement. It is such a shame and waste because it can be avoided with minutes or even seconds of attention during the original construction, and usually for less than $10 of material.
In Montana, construction contracting is not heavily regulated. In most carpentry-related trades (and in “general contracting”) there are no tests. There is no required education. There is no state-mandated training. My 10-year-old could buy a roofing nailer, start an LLC, and start chasing hail storms and selling new roofs. It’s both a blessing and a curse. Who knows how much the contractor knows? Who knows what he or she doesn’t know? What makes it even harder are the many layers of people between the design/engineering teams who make products and plansets, and the part-time college kid, or hard-scrabble Joe-contractor trying to make ends meet, who inevitably ends up doing the final install at a window or roof. It is almost impossible to impose accountability and oversight at every step.
What should have happened?
At these roof/wall sections, like in the picture above, there is a simple piece of metal that costs less than $10, called a “kick-out flashing.” It does just what it sounds like: it takes the water running down the first-floor roof, and “kicks” it out to the outside of the siding or wall cladding, where the roof ends and the two-story wall continues. It takes about three seconds to install. Repairing the wall 10 or 20 or 30 years later might take anywhere from $250 to $2,000 or even more, depending on how extensive the damage is; how deep the rot has penetrated. It often begins eating into the structural studs, and doesn’t stop. We’ve even had to replace the interior drywall and structural floor framing.
At windows the problem is just as avoidable. The window-installer needs to install the flashing and caulk per the window-manufacturer’s instructions, and the siding needs to be flashed, installed, and caulked properly. Basic stuff.
Finally, in all cases, wood should be thoroughly dry before being covered by tyvek or siding. Remember, dry rot does not need moisture to continue growing, but it does need it to begin. Based on what I’ve seen, I think it’s also safe to say that ongoing moisture issues only accelerate the rot.
In Montana, what can you do? There is no standardized skill or knowledge verification. As a home-owner, or even as a builder, it is up to you to ask for and check with references, look at previous work, and verify you are dealing with an experienced and knowledgeable contractor. How many simple mistakes and oversights are possible? More than you can take the time to learn about or check on. When you begin a construction project, if you’re doing it yourself, take the time to get educated on the processes and problems. If you’re going to engage a contractor, find a way to build earned trust. Find out who else trusts this person or company; verify that their work is done right and lasts; learn whether they can think clearly; listen to learn whether they understand potential problem areas; ask how they pursue continuing education; ask about their experience and how they learned their trade.
How do you fix it?
There are three concerns that need to be addressed to fix the problem permanently: structural, continued rot/growth, and future exposure to moisture.
First, all affected materials need to be removed. In addition to a visual inspection, if you can tear the material apart without a saw, it is probably compromised and should be replaced. Keep in mind that some of the components of a wall cannot simply be removed while safely keeping the structure stable; you may need to do the job in sections, or use additional support/bracing.
Second, anti-fungal stain or paint should be applied to everything in the immediate area. Coat whatever studs, osb, or other framing members you did not remove. Assume there is still plenty of hungry fungus around, and spend the extra $1.00 to stop its progress. Then you can replace the framing members you have removed.
Third, install the roofing, siding, windows, and whatever else is missing, but this time do it right. Flash it properly. Lap it properly. Tape it, caulk it, paint it, seal it. Understand how the water originally got behind the cladding, and make sure you don’t repeat the error.